Step by Step Guide
First of all, we need to download the software that we will be needing to install WordPress using FTP. We will need the latest version of WordPress which you can download from WordPress.org by clicking here.
To upload the files via FTP you will need an FTP client. I personally prefer Filezilla which is a popular free FTP client but you can search the internet to find the one…
Unzip the folder you just download from WordPress.org
If you want to install your WordPress on the main domain – www.youdomain.co.nz then upload the files to a folder called /public_html/.
You can upload the files to a directory, for instance, /public_html/blog/ if you want your WordPress site load when visitors go to www.yourdomain.co.nz/blog
Now that our WordPress files are on our web host server it is time to get prepare for the installation.
Database
First of all, we have to create a database for a WordPress installation. To do this, go to your hosting cPanel and locate and click MySQL Database.

You will be then asked to provide a name for your database. Have something that will make it easy to recognise. Then click Create Database.

Sweet, the database is sorted. Now, we will need database user credentials for WordPress to make changes to the database like adding new articles, adding the new pages to the database when you create them. All that fancy stuff that we don’t get to see.
To create a new user go back to the same Create Database page and scroll down until you see My SQL users -> Add a new user. Enter details and click Create a User.
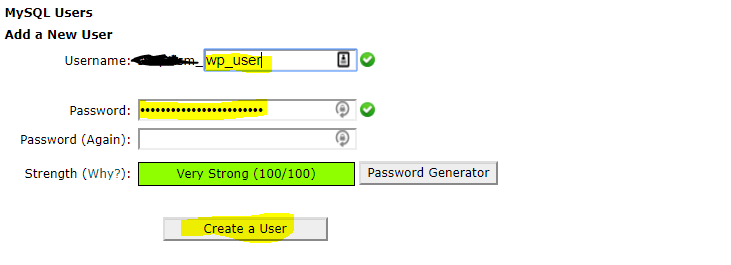
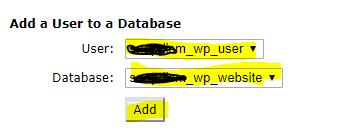
Choice, the user is created now let’s give this user some access so that WordPress uses it to make changes to the database as needed. To give access, we are still on the same page just underneath MySQL users you will see the option to add a user to a database. Select the user and database you just created and click Add.
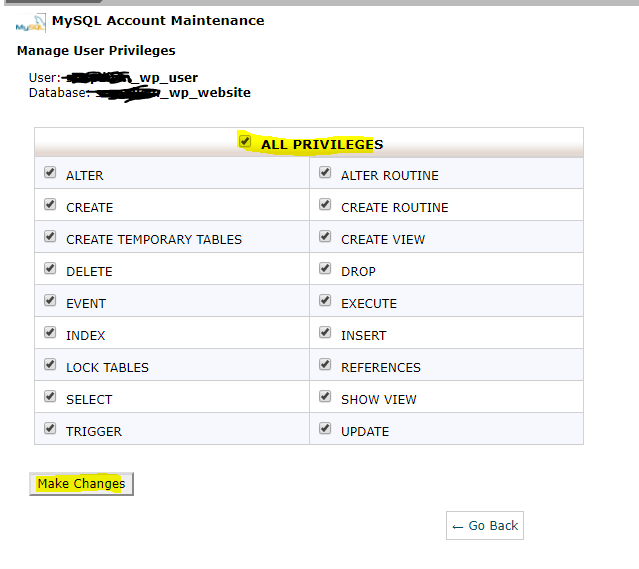
Now that the user is added to the database we need to grant the user all the privileges that will enable it to make changes. To do that, check all the boxes and click Make Changes.
Installation via Browser
Kapai, we are almost there. Now, we simply need to go to our website URL i.e www.yourdomain.co.nz in a browser that will run the WordPress installer. If you don’t see the following steps after entering your website URL then double-check the steps above to make sure if you have not missed anything. Otherwise, you should be redirected to the setup config page.

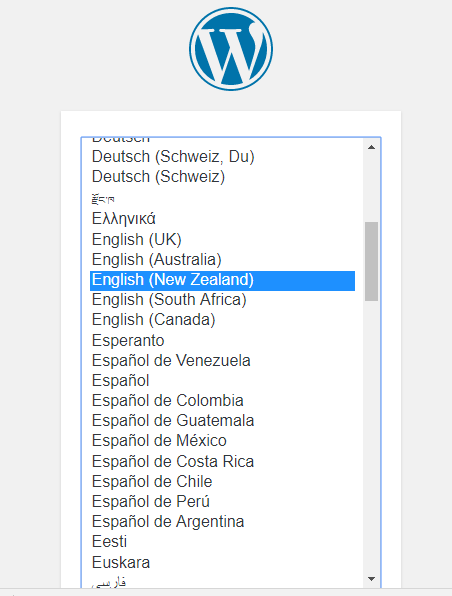
You will be asked to select your language. Select one and click Continue.
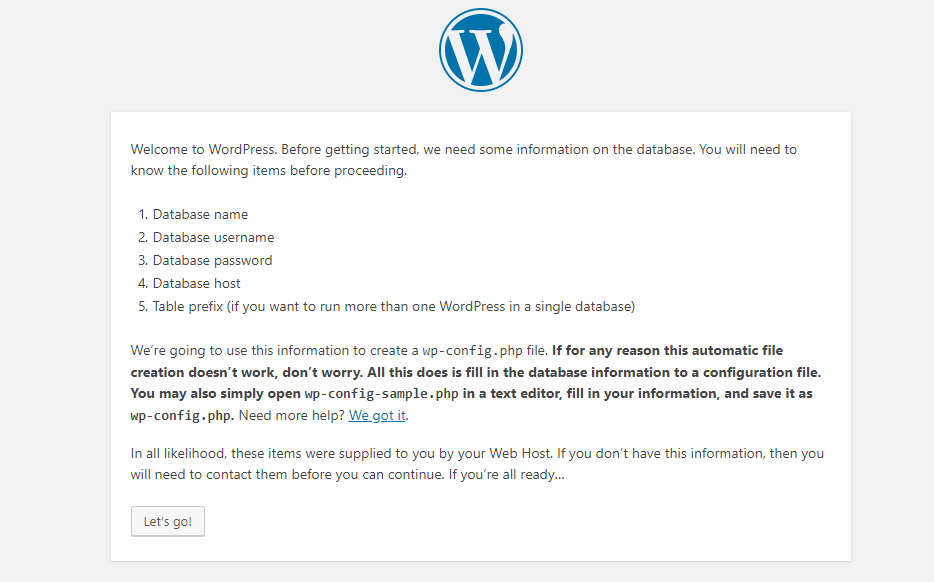
Then you will see important stuff, read carefully it can save a lot of time. You will now be asked to enter the database details we created earlier. Click, Let’s go.
Enter the details then click Submit.
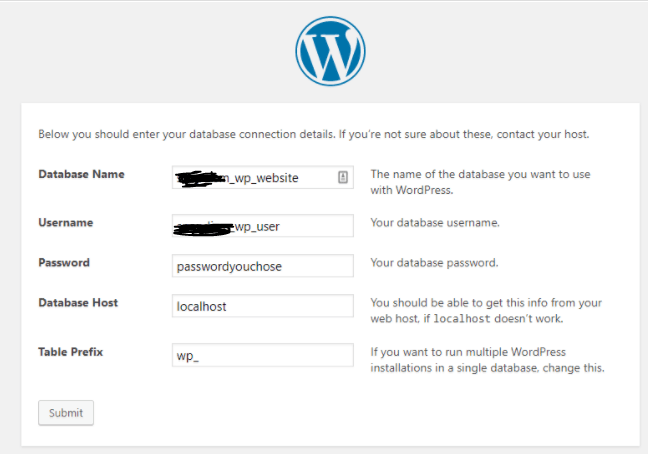
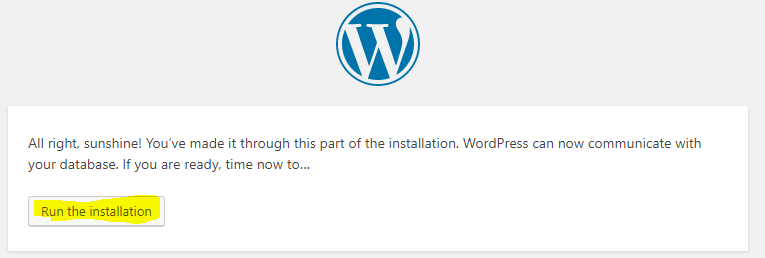
You should see a confirmation saying that WordPress can now communicate with the database. Otherwise, check the steps above and make sure you haven’t missed anything. Then Run the Installation.
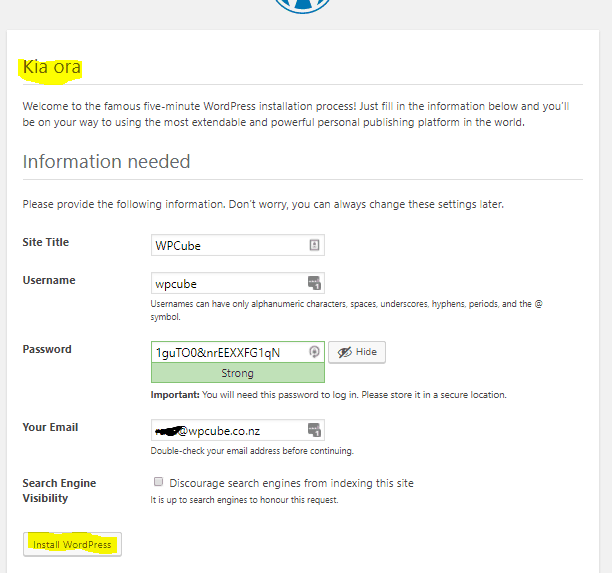
Then you should see Kia Ora from WordPress. Enter the website details then click Install WordPress
Then Success.
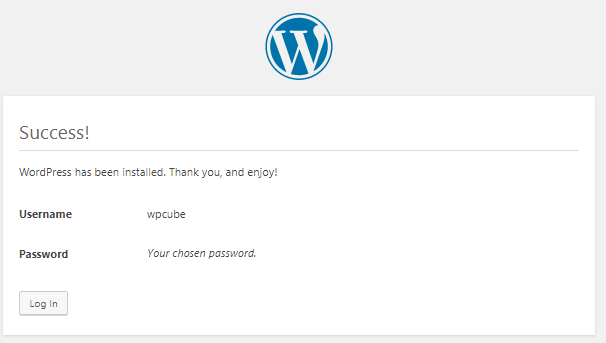
And this was How to Install WordPress using FTP? I hope it helps if you have any questions please ask me in the comment below.

