Why should one wait for a website to load and waste 10 precious seconds? Unless your website is the only one in the country.
Somewhere it stated, that a user only waits an average of 4 seconds for a website to load. Now, reading these two lines probably took you more.
Shortpixel, speed up your website in few clicks (and it works)
- Updated: 17 February 2025
Shortpixel optimises images to help your website load faster.
Imagine, waiting for a website to load.
5G mobile technology, ultra-fast fibre, and even Hyper Fibre are being introduced in New Zealand. Also, tens if not hundreds of similar blogs, websites, and service providers.
Price
5/5
Results
4/5
Features
5/5
Support
5/5
Speed is crucial. Every day new techniques and technologies are implemented just to optimise websites. When building a website – remember – speed is vital.
As website/blog owners it is our responsibility to make sure it loads fast enough for the user. There are a few factors that contribute to website speed and this article covers one of them. Images and how to fix it using Shortpixel’s free plugin.
Table of Content
Why do images slow websites down?
Everything on the internet is some sort of data and data has weight. Ran out of space on your phone because of too many pictures?
There is a bunch of things that can make an image very heavy for the website. The size, type, quality, EXIF, and so on. These qualities are usually not needed thus adding unnecessary load.
To improve the website speed – all we need to do is, remove the unneeded qualities. Make sure its right size, type and doesn’t include any unnecessary data.
However, it is not as simple as it sounds. You need to understand the technical aspect of images and how they work. Also, the technical sides of the website as well.
The worst of all is the time it needs to individually optimise every single image.
This is where plugins like Shortpixel come in to save the day.
What is Shortpixel?
Shortpixel is an image optimisation plugin. You upload an un-optimised image on your website. It compresses, optimises, removes any unneeded data, reduces the size, and serves them on the website.
This improves the website load time significantly.
Just like other plugins, it is installed on your WordPress website, you change a few settings. Voila! You are all done and it will start automatically optimising existing images.
It is also designed to optimise your images as soon as you upload them. You set it then forget it.
There are two Shortpixel image optimisation plugins on the WordPress repository. We discuss both here but mainly focused on the Shortpixel Image Optimizer plugin.
Shortpixel Image Optimizer plugin
Shortpixel Image Optimizer plugin is for any website that has mostly local visitors. The website doesn’t have too many images i.e not an eCommerce website or a professional photographer.
This plugin optimises the images and leaves them optimised. Every time someone visits your website the optimised version is served. All the new uploads are automatically optimised as well.
Works great on a small blog or website that targets users in New Zealand. However, if your website has visitors from outside New Zealand and/or you have a massive amount of images – Adaptive Images would be a better option.
Let’s dive deep into the Image Optimizer Plugin and get you up and running. We will discuss Adaptive Images later in this article.

How to install Shortpixel Image Optimizer?
It runs on API Keys. You will have to create an account with them. Once your account is created they will email you an API key.
Once you have created your account with Shortpixel
- Go to your dashboard
- Head over to Plugins > Add new
- Search for Shortpixel
- Install Shortpixel Image Optimizer (see blow for Adaptive Images)
- Then activate the plugin
- Go to plugin settings and enter the API key that was emailed to you.

These settings are recommended to get you started. You can always change them to meet your website requirements. We will the default ones and list the ones that you need to change or consider changing.
General Settings
When you install the Shortpixel Image Optimizer plugin you will land on General under settings.
First comes the compression type. Each type has a use case. If you are just blogging or has a website for a small organisation – doesn’t matter if you upload tens of photos, use Lossy.
Lossy: It is the recommended option that offers the best compression rate. The image doesn’t change much to be noticeable with the naked eye. Works great for blogs and other small websites.
Glossy: This option is much more for websites that focus on images i.e photographers or website that requires high-resolution images. This will not save you as much space as lossy.
Lossless: As the name suggests – no different from the original image. Good for technical drawings and artists whose images must display details.
If your website uses thumbnails i.e small pictures next to your blog post or in a photo gallery then you should include thumbnails.
Always use the Image backup option, if something goes wrong you can revert back to the originals.
Always Remove EXIF unless you are a photographer and what EXIF is and if you need it. It makes your images much lighter.
Resize large images option allows you to resize your images automatically on upload (and existing). Remember it doesn’t crop it resizes them. You know an 800-pixel image looks great on your website (and you have tried it) then choose this option.
Saves a ton of space and website load times increase significantly. The good thing, the aspect ratio is preserved. It is recommended to use this option and choose a size. Something below 1000 pixels works great for most websites.
Advanced Settings
This section has some advanced settings that are preset by the plugin. Don’t change anything here unless you have. Below are some of the options explained and what the use case can be.
Additional media folder
The plugin automatically optimises the images in the default media folder. If you would like to optimise images outside the default folder – you can choose it here.
Convert PNG images to JPEG
This depends on your website. Again if you are a professional photographer then you should be uploading your photographers as JPEG in the first place. However, if it is graphics i.e logo or screenshots then PNG is the best option.
Now converting PNG images to JPEG is a bit risky. If you do this, your logo for instance will be JPEG which looks awful. Try it. Also, JPEG doesn’t allow transparent background so the transparency on images will vanish.
WebP Images
WebP is the new recommended version of images for the websites. However, I have seen a few problems while serving the WebP from the Image Optimizer plugin. Try it, if it works for your website, definitely go for it.
Optimize media on upload
This is a great option to set and forget. This makes sure all the future images uploaded to your website are automatically optimised.
Save and Go to Bulk Process
It will take you to the Bulk Shortpixel section where you can start optimising your images. Sit back and relax – it will do everything. Remember not to close the page until it is completed.
You can always go back to Bulk Shortpixel by clicking on Media on the left menu.
Shortpixel Adaptive Images Plugin
This plugin is revolutionary. As the name suggests it automatically adapts and serves images that are fit for the screen.
If one is viewing the website on the laptop they see the laptop screen size scaled images. If viewed on mobile the images are scaled to mobile size.
You might think. When you visit a website on a mobile device, you see images that are small and fit the screen. Also, the same site looks with the right size on the larger screen.
What happens there is when a user is looking at a thumbnail which is 150×150 but the website has thumbnails at 250 x 250. There are extra bytes being sent to the user another 100×100 pixel which is not needed.
With Shortpixel AI the images are actually scaled to the size of the screen and served. The user will get 150 x 150 thumbnails with Shortpixel AI. This will speed up things and save resources.
Content Delivery Network (CDN)
Data over the internet travels and travels take time. If your visitors are here in NZ and your website data is from the USA. It will take longer for NZ-based visitors to see your website than the ones based in the USA.
It is not tens of seconds however even milliseconds count when it comes to website speed. And Shortpixel fixes that problem.
Shortpixel serves the images from Content Delivery Network (CDN). CDN is a network of servers throughout the world that serves data to visitors from the closest location. Meaning, it will get to them quicker.
If your visitors are not from outside New Zealand and you have a free CDN service you do not need this functionality.
API (credit) Usage
The Shortpixel Adaptive Images uses more credit than the Image Optimizer plugin. With Image Optimizer, one credit is one image however with Adaptive Images each time the image is scaled. It counts as a credit used.
However, when an image is scaled with Adaptive Images it stays like that on Shortpixel CDN for 30 days. After 30 days it will reset and will use another credit. Where on Image Optimizer it is only one credit per image and stays like that until you reset the optimisation.
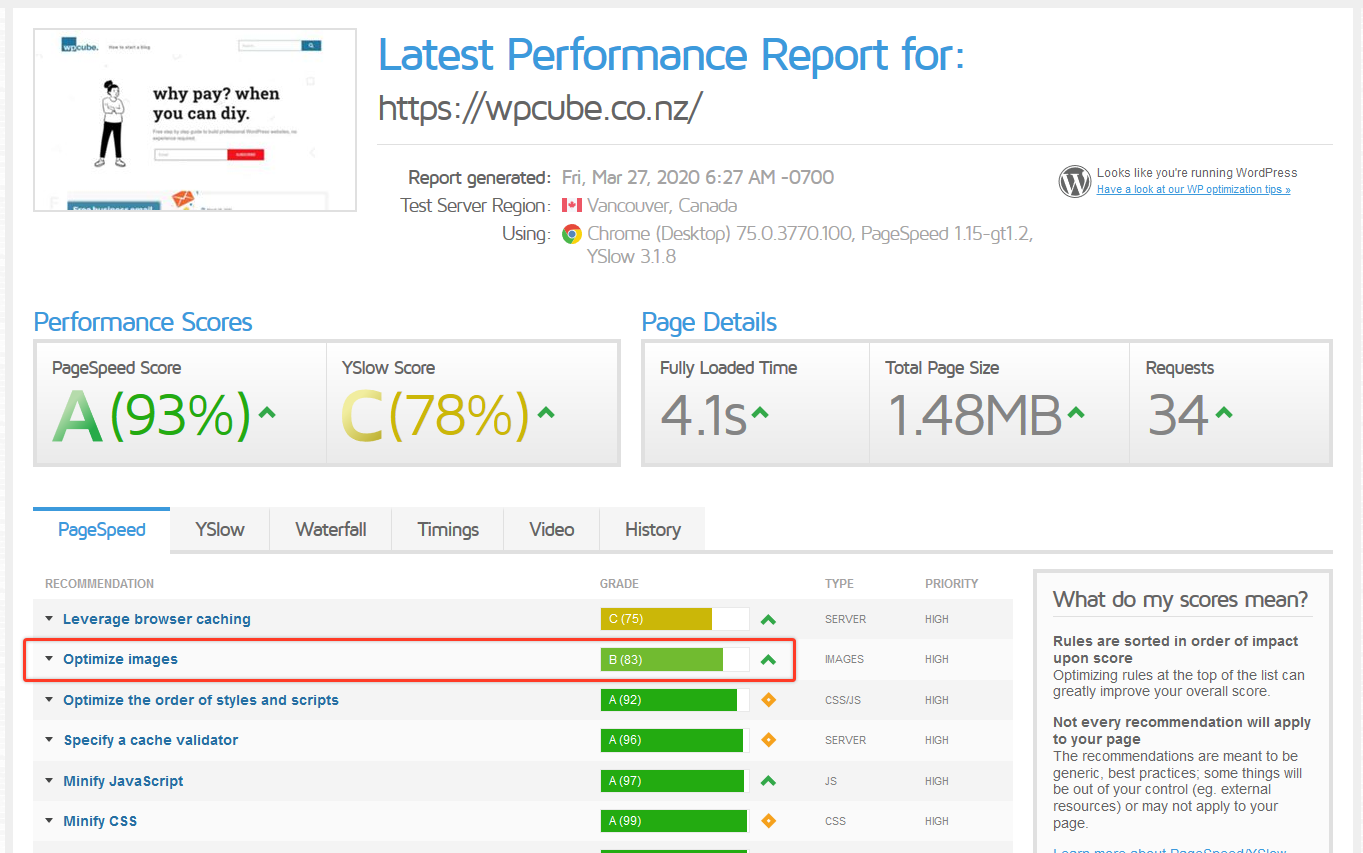
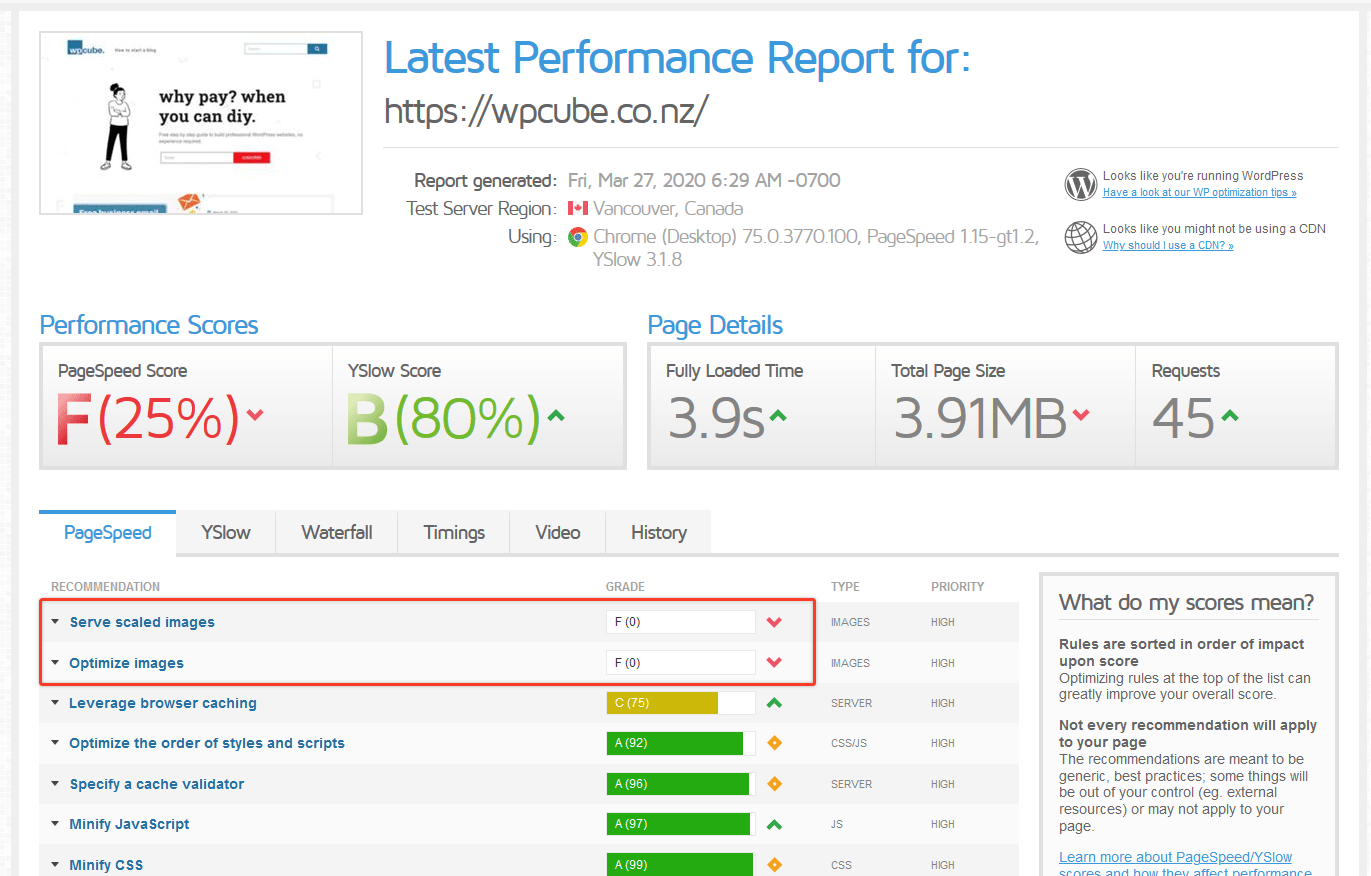
Now, look at these speed tests done on GTMetrix with both plugins.
How to install Shortpixel Adaptive Images plugin?
This plugin requires an account. When the installation is complete you will have to link it with your email that was used to sign up for a Shortpixel account.
Sign up before you go ahead install this one. You can use the same account you signed up with Image Optimizer.

Once you have created your account with Shortpixel
- Go to your dashboard
- Head over to Plugins > Add new
- Search for Shortpixel
- Install Shortpixel Adaptive Images
- Then activate the plugin
Recommended settings for Adaptive Images plugin
Once you have authenticated your account. A notice will appear that will ask you to connect your Shortpixel account.
General
Choose Lossy. Similarly properties as the Image Optimizer plugin (see above for details)
WebP Support: This works great with this plugin so strongly recommended to activate this.
Fade-in effects: Lazy-load loads images as they appear while scrolling down. This improves the loading time. This is a fade-in effect added to lazy loading. It may break your site so disable it if it happens.
Always remove EXIF if you don’t know what EXIF means. If you do know what EXIF is you would also know if you need this.
The smart crop can sometimes crop the wrong part of the image so it is not recommended. Tried it on the eCommerce website which cropped the pictures alright however it did not look good on the website.
Under Advanced settings, make sure the CDN address is correct and you do not change. You can set up your own CDN and they do have some helpful articles to do so.
Replace method best works with SRC. The other two work as well however when all the images have the same usage. If you have a combination of pages with vectors, blogs with images and vectors – they may cause some problems. Common problems are images disappearing.

Image Optimizer or Adaptive Images?
It depends on your requirement. If you are running a blog or a website with visitors from New Zealand and don’t have thousands of images – stick to Image Optimizer. This blog uses Image Optimizer and it works great.
You have an audience throughout the world and/or have a great number of images on your website. Don’t have a CDN go for Adaptive Images.
Should I pay for the plugin?
They have a free plan (100 images per month) which is very generous. It doesn’t sound so but it is. If you have a small website with up to 30 images, 100 is more than you need.
If more than you may want to purchase extra images. WordPress, by default, creates different versions of the image you upload, for thumbnail, medium, and large sizes. So investing a few dollars will only do good.
Again, I recommend starting by signing up for the free account. If you need more, upgrade as needed. The prices are not going to break your bank but, while making a website, they build up to break it.
Final Thoughts
Speed is paramount when creating a website. Whether Google search engine or your visitors – they want a seamless experience. Fast loading websites will beat you on search engine ranking and your visitors – will find a website that doesn’t make them wait.
There are a few factors that cause slow speed and images are one of them. Shortpixel will fix that problem and it will not break the bank.

Newsletter
Signup for news and special offers!
Thank you!
You have successfully joined our subscriber list.
