Get your server IP
- Login into your Vultr account and copy your server IP address. If you don’t have a Vultr account, see How to install WordPress on Vultr in two easy steps.
- Go to Products then click on your server.
- Next to IP address click on Copy IP Address.
Configure DNS
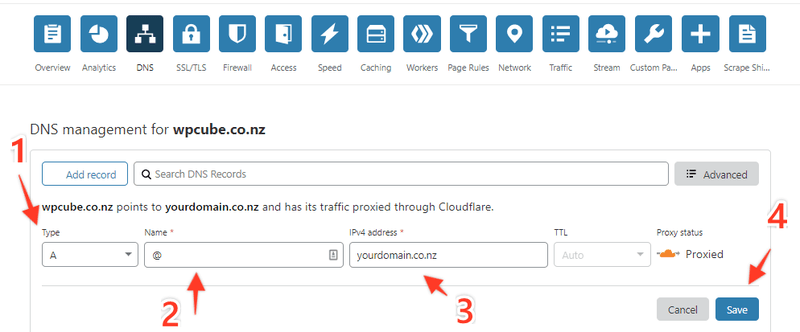
I am using Cloudflare DNS but all domain providers have free basic DNS management. Go to your domain provider account and follow these steps. If you want to know how to use Cloudflare’s free then see
- Select your domain name.
- Then click on DNS tab from the top

- Then click on Add record.
- From Type select A, Name = @, IPv4 Address = yourdomain.co.nz, TTL = Auto or minimum allowed
- Then click save

- You may also need to add a record for www by repeating the above three steps. Add another A record and Name = www everything else stays the same.
Update Your WordPress Setting
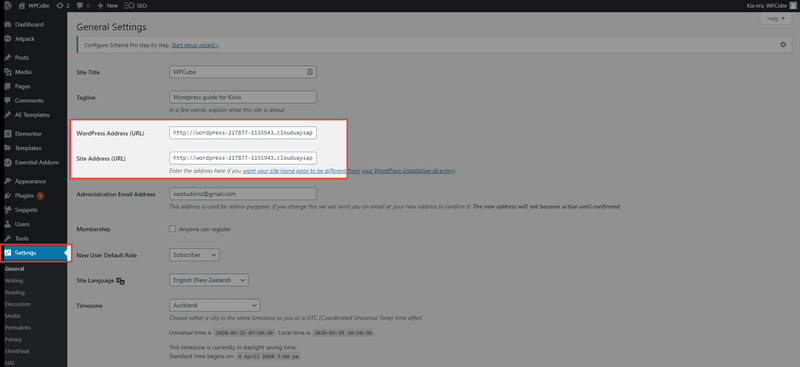
It is important that you update your WordPress settings. Go to settings and change the website URL.
- Go to your WordPress dashboard
- Click on Settings > General
- Change bother WordPress Address (URL) and Site Address (URL) to your domain name.

Check DNS Propagation
DNS propagation can take up to 48 hours. To check if it is pointing to your IP address go to the WhatsmyDNS website
- Go to www.whatsmydns.net
- Enter your domain name and select the record type you just added. In this case A.
- Then click Search
- It will list the IP address A record is pointing to. If it is your Vultr server IP address then you are all good. Type in your domain name in a browser and check where it lands.
In the same series


